totalFrames variable on line 12 and change the number to how many frames you have.
Example: var totalFrames = 45;
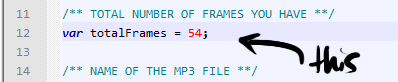 Now that you've made your first change, let me emphasize something. Make sure that semicolon is still there after the number. Semicolons belong at the end of a statement and tells the computer that the statement is finished. Many a programmer have pulled hair out over problems in their code, only to find that there is a missing semicolon. So make sure you don't accidentally delete it.
Next, put the name of your mp3 file in the
Now that you've made your first change, let me emphasize something. Make sure that semicolon is still there after the number. Semicolons belong at the end of a statement and tells the computer that the statement is finished. Many a programmer have pulled hair out over problems in their code, only to find that there is a missing semicolon. So make sure you don't accidentally delete it.
Next, put the name of your mp3 file in the mp3Name variable on line 16. Make sure you leave the quotes there and that there are no spaces in the filename.
Example: var mp3Name = "nolight.mp3";
 Not so bad, right? Now you'll want to skip over the section marked "NO TOUCHY", because you don't want to change anything in there, and go to the section on line 24 that says "YOUR TIMING GOES HERE."

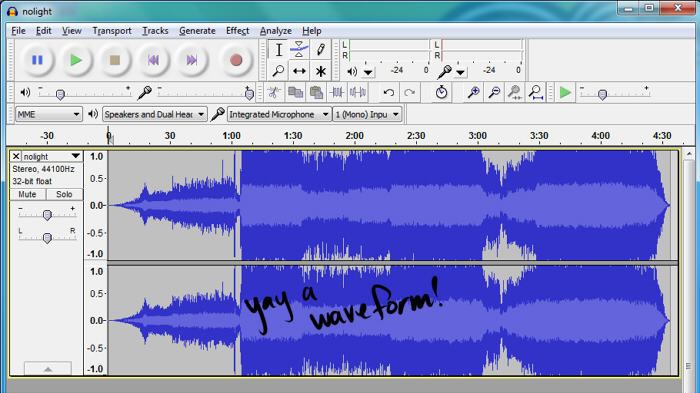 Okay, you got your MP3 all loaded up? See the waveform? Great!
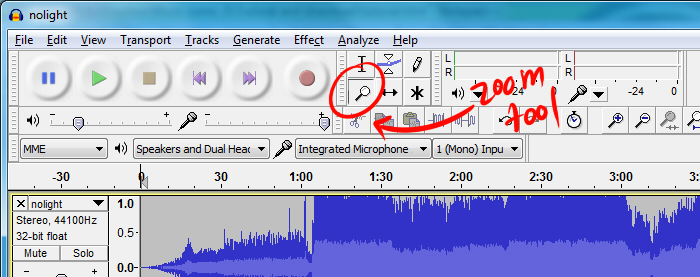
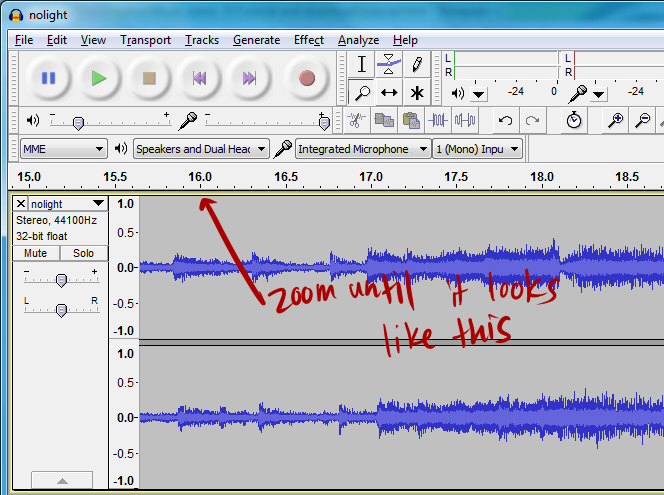
See how it's all squished up so it fits in the window? That sucks for timing, so you're going to need to zoom in. Click on the zoom tool towards the top of the window. When you put your mouse over the waveform, it'll turn into a magnifying glass. When you click, it will zoom in (weird in the context of audio, huh?) so you can see the individual seconds. Zoom enough so that it's timed in seconds with decimals and tick marks for every tenth of a second.
Okay, you got your MP3 all loaded up? See the waveform? Great!
See how it's all squished up so it fits in the window? That sucks for timing, so you're going to need to zoom in. Click on the zoom tool towards the top of the window. When you put your mouse over the waveform, it'll turn into a magnifying glass. When you click, it will zoom in (weird in the context of audio, huh?) so you can see the individual seconds. Zoom enough so that it's timed in seconds with decimals and tick marks for every tenth of a second.
 The general gist of how this goes is that you play the song in Audacity, stop it at a point where you want to make a transition, and make a note of the time in timing.js. Usually, you can't click fast enough to stop it right when you want to, so you'll have to fudge around and find that sweet spot.
I found that using the selection tool in Audacity makes things a lot easier.
The general gist of how this goes is that you play the song in Audacity, stop it at a point where you want to make a transition, and make a note of the time in timing.js. Usually, you can't click fast enough to stop it right when you want to, so you'll have to fudge around and find that sweet spot.
I found that using the selection tool in Audacity makes things a lot easier.
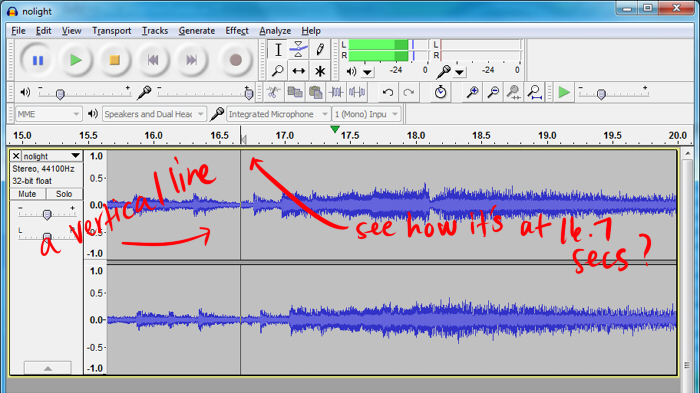
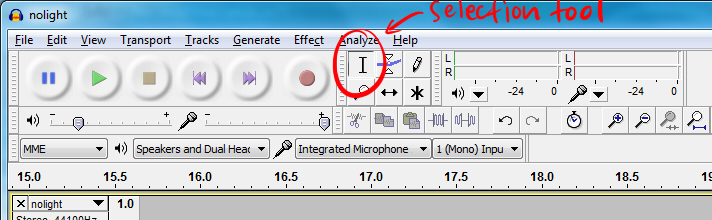 If you put your mouse over the waveform, you'll see the cursor become one of those text-editing type cursors. If you click, it'll put a vertical line down. Now when you click Play, it will play from that point. This makes it easier to repeatedly listen to a part you want to listen to, and it also helps you mark the time where you want the transition to occur.
 First off, 1.jpg is the very first frame that people will see (that is why there is no timing for 1.jpg). I haven't yet figured out why it doesn't show initially in Chrome and Safari, but it's fine in Firefox and IE9. Once I figure it out, I'll make a post about it or something.
So, let's say you're getting the timing for the very first transition: the transition from 1.jpg to 2.jpg.
The way the code is set up, every entry underneath that section marked "YOUR TIMING GOES HERE" corresponds to when that frame will drop in. That means that the number value at
First off, 1.jpg is the very first frame that people will see (that is why there is no timing for 1.jpg). I haven't yet figured out why it doesn't show initially in Chrome and Safari, but it's fine in Firefox and IE9. Once I figure it out, I'll make a post about it or something.
So, let's say you're getting the timing for the very first transition: the transition from 1.jpg to 2.jpg.
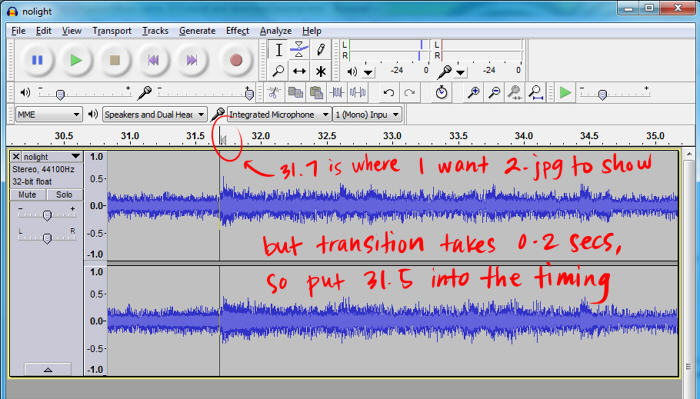
The way the code is set up, every entry underneath that section marked "YOUR TIMING GOES HERE" corresponds to when that frame will drop in. That means that the number value at timing[2] is when 2.jpg will drop in. I found the transition to take 0.2 seconds, so when you find the exact place in your song where you want a transition to go, subtract 0.2 from that time. If it doesn't feel like the timing is right, play around with the number.
Example: timing[2] = 31.5; means that 2.jpg will drop in at 31.5 seconds in.
timing[8] = 68.1; means that 8.jpg will drop in at 68.1 seconds.
 A note about transitions: If the transition occurs in a time that is small (maybe an interval of less than 2 seconds), sometimes the sliding doesn't work properly. Keep this in mind.
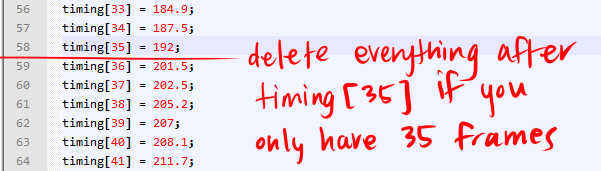
If you have 35 frames, the very last timing will be
A note about transitions: If the transition occurs in a time that is small (maybe an interval of less than 2 seconds), sometimes the sliding doesn't work properly. Keep this in mind.
If you have 35 frames, the very last timing will be timing[35] = number;. The code already in timing.js goes all the way up to 54. If you do not have 54 frames, and instead have 35, delete everything after timing[35] = 192; (or whatever your timing[35] would be).
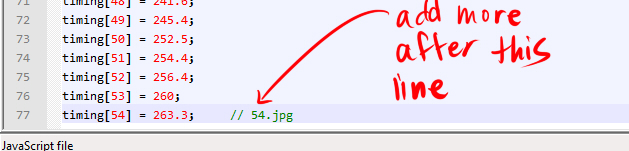
 If you have more than 54 frames, add lines after
 timing[54] = number; in this format: timing[framenumber] = transitionnumber;. Replace framenumber with the number of the frame, and transitionnumber with the time of the transition. Again, don't forget the semicolon.
 Some tips about the timing:
timing[23] = 102; and then timing[24] = 95; because that doesn't make sense.timing[28] = 208;. Delete all the lines after timing[27].
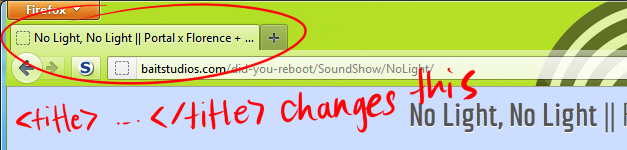
<title> </title> on line 6.
Example: <title>No Light, No Light || Portal x Florence + The Machine || did-you-reboot</title>

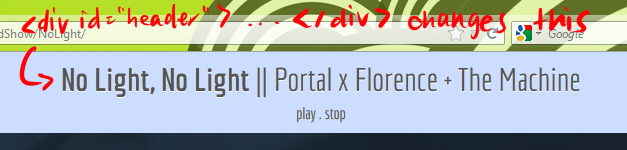
 Change the header on line 21, so that it will show the title that you want at the top of the page.
Example:
Change the header on line 21, so that it will show the title that you want at the top of the page.
Example: <div id="header"><b>Awesome Bolded Title</b> || Some not-bolded text!</div>
Awesome Bolded Title || Some not-bolded text!

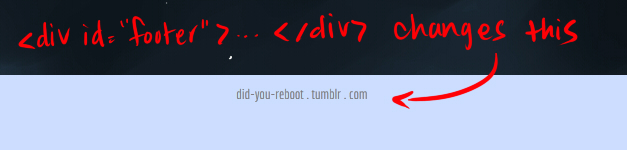
 Change the footer on line 32 so that it has your URL to your Tumblr or wherever else you want to point to. Alternatively, you can delete it if you don't want it.
Example:
Change the footer on line 32 so that it has your URL to your Tumblr or wherever else you want to point to. Alternatively, you can delete it if you don't want it.
Example: <div id="footer"><a href="http://did-you-reboot.tumblr.com">did-you-reboot . tumblr . com</a></div>
How links work:
<a href="http://did-you-reboot.tumblr.com"> and </a> is what you see on the page.
href part of the <a href="..."> is the place you will go to if you click the text you see on the page.

 This part is important. You need to change the canvas width and height on line 27 to match your frames' width and height.
Example (for frames that are 600 x 400):
This part is important. You need to change the canvas width and height on line 27 to match your frames' width and height.
Example (for frames that are 600 x 400): <canvas id="theCanvas" width="600" height="400">
 If you want to change the page colors and fonts and things, it's a little more advanced. I'm not about to teach you guys how to use CSS, but if you care to learn on your own, you can modify style.css. If you want to change fonts, Google Webfonts is AWESOME. Look up a tutorial on how to embed fonts if that's what you want.
images folder containing all your frame jpgsJPlayer foldercomic.js, timing.js, jquery.jplayer.min.js, jquery-1.7.2.js (all the JS files I provided)index.htmlstyle.cssThis was a labor of love by did-you-reboot. The mechanisms for timing were borrowed from Chell in the Rain and modified to work with HTML5 canvas.